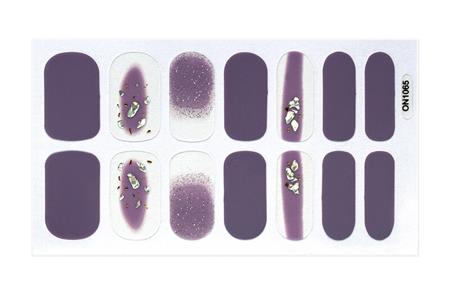
In the world of nail art, innovation is constantly pushing boundaries, and Nail Foil Wraps have emerged as a game-changing trend. These wraps offer a convenient and creative way to achieve stunning nail designs that were once reserved for professional salons. Let's delve into the world of Nail Foil Wraps and discover how they're revolutionizing DIY nail art. Nail Foil Wraps are adhesive sheets designed to transfer intricate metallic or holographic patterns onto your nails. With a simple application process and a vast array of designs, they empower nail enthusiasts to achieve salon-worthy nail art from the comfort of their own homes.

Unlike intricate freehand designs, nail foil wraps come with pre-designed patterns that only need transferring. This takes the guesswork out of achieving intricate nail art. Traditional nail polish requires time to dry, leaving room for smudges and imperfections. With nail foil wraps, there's no waiting – once applied, your design is ready to flaunt. Nail foil wraps come in a myriad of patterns, from geometric shapes to abstract art. This variety allows you to experiment and find a design that resonates with your style.These wraps can be applied to the entire nail or used as accents for a unique touch. The versatility of nail foil wraps lets you customize your nail art to suit any occasion. High-quality nail foil wraps are designed to last. They resist chipping and fading, providing you with vibrant and eye-catching nail art that endures.
A Step-by-Step Guide to Nail Foil Wrap Magic
1. Prep Your Nails: Start with clean, dry nails. Push back your cuticles and shape your nails to your desired length.
2. Choose Your Design: Select the nail foil wrap design that appeals to you. Cut it to match the size of your nail.
3. Apply Adhesive: Apply a layer of nail foil adhesive to your nails. Let it dry until it's tacky to the touch.
4. Transfer the Foil: Place the nail foil wrap onto your nail, pattern side up. Gently press down to ensure it adheres to the adhesive.
5. Peel Away: Slowly peel off the nail foil wrap, leaving behind the transferred design. If some areas didn't transfer, gently press the foil back onto those spots and peel again.
6. Seal and Shine: Apply a clear topcoat over your nail foil design to seal it and add a glossy finish. This step enhances the longevity of your nail art.
Nail foil wraps have unlocked a world of creative possibilities for both seasoned nail artists and those new to the nail art scene. With their user-friendly application and breathtaking results, they're rewriting the rules of DIY nail art. Whether you're seeking a quick way to glam up for an event or a new avenue for self-expression, nail foil wraps are here to transform your nails into dazzling works of art. Say goodbye to time-consuming techniques – nail foil wraps are the shortcut to nail art brilliance.
Copyright © 2025 Dongguan Blueprint Printing Company All rights reserved.


