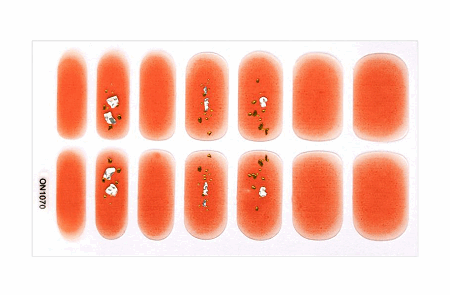
Nail art has become increasingly popular, allowing individuals to express their creativity and showcase unique designs on their nails. One convenient and trendy way to achieve stunning nail art is by using Nail art stickers. These stickers come in a wide array of designs, colors, and patterns, making it easier than ever to achieve flawless nail art. In this article, we will highlight the first crucial step in using Nail Art Stickers to ensure a polished and long-lasting result.

Preparation: The Key to Successful Nail Art Sticker Application
1. Clean and Shape Your Nails:
Before applying any nail art stickers, it is essential to start with clean and well-shaped nails. Begin by removing any nail polish remnants with a gentle nail polish remover. Follow up with filing and shaping your nails to achieve the desired length and shape. By ensuring a smooth and tidy nail surface, the nail art stickers will adhere better and create a seamless finish.
2. Take Care of Cuticles and Moisturize:
Next, pay attention to your cuticles. Gently push them back using a cuticle pusher or orange stick. Trim any excess skin carefully to create a neat appearance. Remember to moisturize your nail beds and cuticles, as this will help keep your nails healthy and prevent dryness or flakiness. However, ensure that the moisturizer is fully absorbed and that your nails are completely dry before proceeding to the next step.
3. Choose the Right Size and Design:
Nail art stickers typically come in various sizes to accommodate different nail shapes and sizes. It is crucial to select the stickers that best fit your nails for a professional, customized look. Additionally, consider choosing a design that complements your overall style and reflects your personality. This way, you can create an eye-catching and personalized nail art look.
4. Position and Apply the Stickers:
Now that your nails are prepped, it's time to apply the nail art stickers. Start by carefully peeling off the desired sticker from the sheet, using tweezers or your fingertips. Position the sticker on the center of the nail and gently press it down, ensuring it adheres well. Smooth out any wrinkles or air bubbles by pressing from the center towards the edges using a cuticle pusher or orangewood stick. Repeat this process for each nail until the desired design is achieved.
5. Seal and Protect the Design:
To ensure the longevity of your nail art stickers, it is crucial to seal and protect the design. Apply a high-quality top coat over the entire nail, including the sticker. This top coat will not only add shine and dimension to your nail art but also prevent the stickers from peeling or chipping. Allow sufficient time for the top coat to dry completely.
Using nail art stickers is an easy and creative way to achieve stunning and intricate designs on your nails. However, proper preparation is key to ensuring a successful application and a long-lasting result. By following the first crucial step of cleaning, shaping, and moisturizing your nails, you create a solid foundation for the nail art stickers. With careful positioning, application, and sealing, you can achieve professional-looking nail art that showcases your unique style and adds a touch of flair to your overall appearance.
Copyright © 2025 Dongguan Blueprint Printing Company All rights reserved.